Homesteading In The Pacific Northwest

Thursday, February 4, 2010

Adventures in Color...Tints, Tones and Shades....

Tints are a pure color mixed with white (or diluted with water for our dyeing purposes). Tones are color mixed with gray and shades are color mixed with black. By mixing the colors with gray or black I achieved the earthier, muted colors that I am interested in working with.

I made many mixtures of warm blue-violet with water, gray (10% black and 90% water) and black dye.


After making many yarn test samples I came up with mixtures that gave me the colors I was looking for.


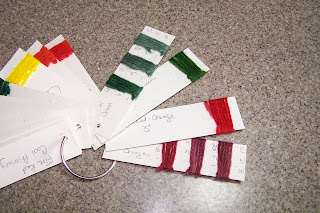
I made test dye samples for several more colors, added them to my color wheels with notes on the porportions of color, water and black dye.....


….and then it was play time!!

"Moss"
Blue Faced Leicester wool, Mulberry silk and firestar

"Blueberries"
Merino wool, Mulberry silk and angelina


"Boysenberries"
Merino, angora, silk and angelina

I am very happy with the batts I made with the fiber from my first hand mixed dye experiments.  The "Boysenberries" colorway is exactly what I wanted for a shawl that I have been planning for myself.  I'm going to have to dye up a large batch of fiber and I know I can match the color again ... I have the recipes on my color wheel cards!  Then I'm going to spin it up and crochet myself a lovely shawl...and I'm already thinking of designs for the shawl pin I'll make to go with it...something with silver and amethyst I think....

Enjoy!

Deb
Tuesday, February 2, 2010

Adventures in Color...Making the Color Wheels...

Now for the fun part! It's time to dye some fiber samples...


My dyeing set up

I cut 1 to 2 yard lengths of an undyed wool yarn and soaked them in a mixture of water with a few drops of Synthrapol (a wtting agent - it allows the wool to soak up the water) and a small sprinkle of citric acid (you can use white vinegar instead – I don't like the smell).

I placed a piece of the yarn on a small square of plastic wrap and added enough dye to completely wet it.


 I wrapped up the plastic wrap around the yarn and placed it in a small canning jar which I had previously numbered from 1 to 10 with a Sharpie marker.

I kept track of which color went into which jar in my dyeing journal.

I put the 10 canning jars on the turntable of my old microwave (IMPORTANT! Keep a separate set of utensils, pots, jars, etc. for dyeing...NEVER use them again for food preparation).


I microwaved the jars with the wrapped yarn for 3 minutes. There was a lot of popping sounds (like making microwave popcorn) as the plastic wrap expanded with the heat.


I let the wrapped yarn cool (they were VERY hot!) and then removed the plastic wrap and rinsed any excess dye out in clean water.


To keep my colors from getting mixed up while they were drying I punched holes in a piece of cardstock and labeled the holes for each color.


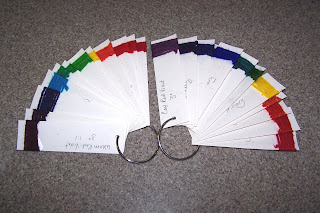
When the yarns were all dry I made up color wheels; one each for the warm and the cool palettes. I cut 1 ½ by 5 ½ pieces of card stock, punched a hole in one end and labeled it with the color.


I taped one end of the yarn to the cardstock and then wrapped the yarn around it 6 or 7 times, pulled the end of the yarn under the wraps and secured it with a half hitch knot. I repeated this for all of the yarns and placed then on metal rings (hardware store...usually near where the make keys).


And here are the two color wheels (or fans)...


Coming soon...tints, tones and shades...

Enjoy!

Deb