Homesteading In The Pacific Northwest

Monday, November 29, 2010

Artisan Bread...Easy and Affordable...

This is a great, easy recipe for a really good loaf of crusty, artisan bread.  A loaf of artisan bread in my local grocery store sells for $3.99.  I can make my bread using locally milled organic flour for about $1.75 a loaf!

Now, I should warn you that it takes 2 days to make this bread...don't panic!  The hands on time is probably less than 20 minutes...


Here are our ingredients:
3 cups flour ( I used an  Unbleached All Purpose White Flour from Fairhaven Organic Flour Mill ), plus a little more for dusting.
1/4 teaspoon instant yeast 
3/4 tablespoon sea salt
1 1/2 cups warm water
small amount of butter

To make the bread you need 2 large bowls, a wooden spoon, a plate and a large covered pot...


Lightly coat one of the bowls with butter. Dump the 3 cups flour, yeast, salt and water into the other bowl and stir until it form a loose dough (I use my Kitchen Aid mixer for this step...it's easier on my hands).


Dust your hands with a little flour, remove the dough from the bowl and form it into a ball and place in the buttered bowl.  Cover with plastic wrap...place the bowl in a warm place and forget about it for 12 to 18 hours.   After that time it will look like this...


Dump the dough on a floured surface.... (dust your hands lightly with flour and use them to scoop out any dough that sticks to the bowl).


Fold ends of dough over a few times and form into a ball shape.  Place the dough on a generously floured plate and sprinkle with more flour...

 
Cover the dough with a towel and set somewhere warm for 2 hours (my house was cold that day, so yes, that is a heating pad under the dough :)  After 90 minutes of the 2 hour raising time set your oven for 450 degrees and set the covered pot in the oven to preheat...


After the pot has been in the oven (don't you just love my 1956 GE Range with Double Ovens?...I Do!!!) for 30 minutes, remove it from the oven (use potholders, it's HOT!), uncover and dump the dough into the pot.  Replace the cover and bake covered for 30 minutes.  Take the cover off the pot and bake another 10 to 15 minutes, until golden brown.  The bread will sound hollow if thumped.  Remove the bread from the oven and place on a rack to cool....


Serve warm...preferably with your own homemade butter  :)

Enjoy!

Deb
(Recipe adapted from Jaden Hair who adapted it from Jim Lahey)

Saturday, November 27, 2010

Mmmmmmm...Butter!

Here is one of my favorite things to have in my fridge...fresh, homemade butter....


Ingredients:
Heavy Cream (preferably organic)
Sea Salt (optional)


Pour the cream into the bowl of a mixer (or food processor)....


...turn the mixer on medium low and beat until cream starts to thicken...


...turn speed up to high and beat until buttermilk starts to separate...scrape down sides of bowl as needed....


I cover my mixer with a towel at this point so it doesn't throw buttermilk all over the kitchen...it's going to start sloshing soon....


When you hear a lot of sloshing and the butter is glommed on to the beater...it's done...


Scoop the butter into a sieve and press with a spatula to remove the remaining buttermilk (you can mix in a little salt at this point if desired)....


Store the butter in a small bowl...and don't forget to to save the buttermilk!  It's great for baking (especially biscuits...but that's another post :)

Enjoy!

Deb

Marissa's Jewels....

For the Bride....

For the Bridesmaids...

For the Moms...

Enjoy!
Deb

Monday, November 15, 2010

Marissa's Jewels Continued....

Coming back to jewelry making after a two year sabbatical has been an experience!  Everything takes twice as long as I think it should...I promise I'll be the most organized jewelry artist on the planet before this is done...since I have to search and find everything I need and I'm labeling all my drawers and boxes as I go along...I spent an hour this  morning looking for my 3mm bezel cups!!  I bet they heard me snarling all the way to Seattle...

I've almost finished Marissa's pendant and earrings...a little more sanding to go and a couple of bezel cups to add...I hope to fire them tomorrow and then on to the enameling....


Enjoy!

Deb

Friday, November 5, 2010

Eat Local...Another Option....

It is November and out little local produce stand has closed for the season....and it's Olympia Local Foods to the rescue! This is the brilliant brain child of Tom and Celia Husman, owners of Tachira Farm ...easy, one stop shopping for local produce, dairy, meats and many more goodies!  It almost seems too easy.  I place my order online between Friday morning and Tuesday morning and pick up my order on Thursday afternoon.  And every week my order seems to get a little bigger as I try new products...


This is the order we picked up yesterday.  I love knowing that my cage free, organic eggs came from Yelm, the carrots from Shelton and the squash from Olympia ...all of my order was from a less than 50 mile radius of our home!


Last night I made a stir fry of chicken, peppers, onions and kale...tonight a bean soup with chard and carrots...

Enjoy!

Monday, October 18, 2010

Pumpkins!

I thought it was time to show you what I did with the lovely sugar pie pumpkins
I bought at the produce stand....


First I cut the pumpkins in half and scooped out the seeds...


I placed them on a baking sheet, covered them with foil and baked at 350 degrees for one hour. After they cooled I scooped the pumpkin away from the skin.


Here are our ingredients....

Place the following dry ingredients in a large bowl:
2 cups flour
1/2 cup sugar
1 tsp baking soda
1tsp salt
1/2 tsp ground cinnamon
1/2 tsp ground cloves
1/2 tsp ground nutmeg
1/2 cup raisins
1/2 cup chopped walnuts or pecans

 In another bowl place and mix well with a fork:
1 cup pumpkin
1/2 cup plain low-fat yogurt
1/2 cup honey
1/4 cup softened butter
2 large eggs

Add the moist ingredients to the dry ingredients, stirring just until moist.  Spoon batter into a loaf pan that has been coated with cooking spray and bake at 350 degrees for 50 minutes.  Cool in pan for 10 minutes and then turn out onto a rack and allow to cool (if you can wait that long...I can't :)


And what about all the rest of the pumpkin you cooked?......


It freezes well...and you have more for making more bread...
Enjoy!

Deb

Sunday, October 10, 2010

Leek, Potato and Sausage Soup...

Let's take a look at our ingredients...


There's 2 more of the Aidell's Chicken and Apple Sausages and the rest of the chanterelle from the pizza I made 2 nights before, the last of some spinach from Olympia Local Foods (a little past its prime now), two leeks from the $1.00 a bag shelf at the produce stand, potatoes from my garden, the chicken broth I made in the last post, some ground cumin and a little bit of cream.  So, by using bits and pieces of things left in the fridge and freezer I'm making a quick, light meal for two with very little cost (add another sausage, another cup and a half of broth and another potato in the soup and serve with a half of a grilled cheese and tomato sandwich and you would have a full meal for four).  But it isn't serendipity that those bits and pieces are there...as I made the original meals I deliberately set aside small portions, knowing that I wanted to make this soup...I call this using "planned overs" instead of "leftovers".

So...on to the soup.  Chop and rinse the white part of two leeks.  Saute the leeks in one tablespoon of olive oil over medium heat until it is soft and translucent, about 4 minutes.  Add 1/4 tsp ground cumin and cook for one minute more.  Add 2 cups of chicken broth, 2 potatoes (peeled and cut into 1/2 inch dice) and the sausages (cut into 1/4 inch slices).  Cook over medium heat until the potatoes are tender.  Add the mushrooms (chopped), a couple hands full of spinach and one tablespoon heavy cream.  Heat for a minute or two and serve with a crusty roll.


You can make this soup without the chanterelle mushrooms and it is very good...but with the mushrooms it is great!

Enjoy!


Deb

Friday, October 8, 2010

Earthly Joys and Natural Wonders....

I am still finding myself drawn to fiber art...and combining it in with my jewelry to make a statement...


 Enjoy!

Deb

Earthly Joys and Natural Wonders....

I am still finding myself drawn to fiber art...and combining it in with my jewelry to make a statement...


 Enjoy!

Deb

The Rest of the Chanterelles...But First...Some Chicken Broth...

I used the rest of the chanterelle mushrooms in a wonderful Leek, Potato and Sausage Soup.  One of the things that makes the soup so good is the homemade chicken broth I use...so I'll show you how to make it first. The soup goes together very quickly; you can make the broth and the soup easily in an afternoon.

First, the chicken...to get good broth you need to start with a GOOD CHICKEN!


Organic, free range, local...on sale...$1.29 a pound! 

I wash the chicken, remove and dispose of the gizzards, and place the chicken in a stock  pot.  I keep a bag in the freezer and whenever I have onion ends and peels, ends of carrots or celery, mushroom or parsley stems; into the bag they go.  When I make broth I grab a few handfuls out of the bag and put them in the stockpot.  Cover the chicken and vegetables with water; about four quarts.  Bring to a slow simmer over medium heat and then reduce heat to low and simmer for an hour.


After an hour, remove the chicken from the pot and allow to cool.  Remove the meat from the bones, discard the skin and return the bones to the pot.  Refrigerate the meat in a storage container...we'll be using it soon :) Simmer the broth for another hour, allow to cool and then strain through a colander, removing the bones and vegetables.  Ladle the broth into storage containers, reserving some for the soup, and
freeze the remaining broth.


I freeze some of the broth in ice cube trays, pop the frozen cubes out and keep them in a storage bag in the freezer for when I need a small amount of broth.


Coming up next...the soup...

Enjoy!

Deb

Tuesday, October 5, 2010

Eat Local...Buy Local....

There has been a lot of talk in the news and on the internet lately about eating local and the high cost of eating well.  I thought I would share my local answer to both problems....


The S and S produce stand is about four miles down the road from our home.  Note that the sign says that they take EBT Cards (food stamps). 


A beautiful display of pumpkins at the entrance to the produce stand.


This is Steve, owner of the stand in front of his fruit displays.  He buys as much of his produce locally, organic if possible, and direct from the growers to save money; a savings he passes on to his customers.  This year the stand opened on April 2 and will stay open, as Steve puts it "Until I have to wear long johns four days in a row."


These are a local wild mushroom available only after the first rains in the fall.  There are considered a gourmet delicacy and sell for $12.99 a pound in the stores.  Steve buys his direct from the forager and prices them so we can all enjoy a few.


Mostly local salad greens.


Many varieties of new crop, Washington State apples.


"Day Old" produce available for $1.00 a bag.  All still perfectly wholesome, just not as
pretty as the fresh stuff.


This was my haul for the day...I'm going to do some canning.  All for $29.75!!


In Michael Pollan's book, "Food Rules", Rule #19 says:

"It it came from a plant, eat it;
if it was made in a plant, don't"

I can't say it any better than that!

Deb

Thursday, September 23, 2010

It's Not Easy Being Green...

Oh, the dilemmas...


My covered beds are being warmed by a light bulb...


And I'm using grow lights in my greenhouse.  Mike says that using power to grow food isn't "green".  Maybe he's right...I'm not growing many things that I couldn't get from my local CSA.  My garden might just be a luxury....


This is my storage bag dryer...yes, I wash, dry and reuse my plastic storage bags.  So, I guess that somehow being "green" is all about trade offs, really....I hope I get points for trying!


Deb

Monday, September 20, 2010

Thowing Some Wool Around...

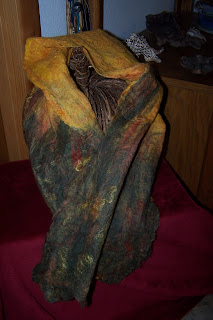
My First Wet Felted Scarf ...merino and mohair...

"Harvest Dance"

Enjoy!

Deb

Thowing Some Wool Around...

My First Wet Felted Scarf ...merino and mohair...

"Harvest Dance"

Enjoy!

Deb

Saturday, September 18, 2010

On the Bright Side...

It's hard to find much that is good about the incredibly cold, wet summer we had here in the Pacific Northwest...but I found this today...normally my flower baskets would have dried up and gone to seed weeks ago, but this year they are still blooming and beautiful in the middle of September...


Enjoy!
Deb

Friday, September 17, 2010

Otters!

I found these two sitting on our dock yesterday...feasting on wild crayfish fresh from the lake...


Enjoy!
Deb

Friday, September 10, 2010

My Pasta Sauce Recipe....

My mother made great pasta sauce!  She simmered it all day and the aromas coming from the kitchen were heavenly.  I used to make it the way she did, but one time when I was in a hurry I used a sauce from a jar and found that with just a little tweaking it was as good (or better) than my old version.  So here. as promised, is the updated recipe for my pasta sauce....


Ingredients:
2 tablespoons olive oil
1/2 onion, finely chopped
2 cloves garlic, minced
2 cups sliced cremini mushrooms
1 quart Oven Roasted Tomato Sauce ( or 1 jar Classico Mushroom and Olive Pasta Sauce)
One cup good red wine
3/4 cup sliced Kalamata olives
Chopped fresh herbs (basil, rosemary, parsley)
2 bay leaves
Ground black pepper to taste


 Heat olive oil in sauce pan over medium high.  Add onions, garlic and mushrooms and cook for about 5 minutes.  Add sauces, wine, herbs, olives and pepper to taste.  Add meatballs from previous recipe and simmer for about 45 minutes.


Prepare pasta according to package directions, drain and serve with pasta sauce.  Grate good Parmesiano Reggiano cheese over pasta before serving.

Enjoy!

 Deb