Homesteading In The Pacific Northwest
Showing posts with label Preserving the Harvest. Show all posts

Tuesday, December 4, 2012

Storing Potatoes, Onions and Squash ...

You may remember that last year I started using our "Hobbit Hole" as a root cellar.  Well, it turned out that it was not that brilliant an idea after all (sorry, FitzGyver).  The humidity during our winter months (otherwise known as the monsoon season) was way too high out there and a lot of my produce ended up getting moldy.  After assessing other areas I found that the area in the garage where I have my pantry storage will also work well for root cellaring.  The temperature in the summer doesn't go above 60 degrees and in the winter months it stays above 45 degrees with an average humidity of about 50%.


Before S&S Produce closed for the season I bought 50  pounds of red potatoes and 50 pounds of Yukon Golds.  Steve brings these in at the end of the season especially for people who plan to store them over the winter months ... they've been kept cold and in the dark.  And at 36 cents a pound it's definitely worth finding room for them. They last pretty well as long as I keep them covered and when I start noticing signs that they are beginning to sprout I can use other forms of preserving (more about that later in this post).


I also bought 50 pounds of onions at 28 cents a pound.  If I rotate the bag once a week so the ones on the bottom move to the top these onions will last until spring.


I bought hard squash at 50 cents a pound ... I use the delicatas and acorns first as they have the shorted storage life ... the butternuts will last for months.


I guess I ought to explain my rationale behind buying as opposed to growing these.  I have grown all of these in my garden so I've proved to myself that if the SHTF I can grow them if I need to.  But at these prices I prefer to use my garden space for other things.  And all of the produce was grown in Washington or Oregon so it meets my criteria for "buy local :).

Now, about preserving ... some of the Yukon Golds on the top of the box are just beginning to sprout a bit so I am freezing them a few at a time as I find ones that need it (I check the boxes carefully once a week).  Yes, I could can them but I really don't like the texture of canned potatoes (I am going to dehydrate some of them).     
I did a batch this week that I diced to be used in soups and stews or for fried breakfast potatoes.

I peeled and diced the potatoes and set them in a bowl of cold water (keeps them from discoloring) while I prepared a pot of boiling water.


I then transferred the potatoes to a colander, placed it in the pot of boiling water and blanched the potatoes for 3 minutes (if you freeze raw potatoes the will become mealy).


After three minutes I placed the colander in my kitchen sink which had been filled with ice water.


When the potatoes were cold I placed them on a cookie sheet lined with parchment paper (the potatoes stick to the metal sheet but are easy to separate from the parchment ... and the parchment can be reused) and blotted off excess water with a clean kitchen towel.

I put the cookie sheet in the freezer for about 6 hours and then popped the potatoes off of the parchment ...


And sealed them in freezer bags with my Food saver.


As more of the potatoes need to be preserved I'm going to do some as sliced for Potatoes Au Gratin and others I will mash with butter and milk and freeze to have mashed potatoes ready to thaw whenever I need them.

Enjoy!


Wednesday, November 7, 2012

Pumpkin Bread Mix In A Jar


For the mix, layer the following in a quart canning jar in order given:
2 cups flour
1/2 cup sugar
1 tsp baking soda
1tsp salt
1/2 tsp ground cinnamon
1/2 tsp ground cloves
1/2 tsp ground nutmeg
1/2 cup chopped walnuts or pecans
1/2 cup raisins

Additional Ingredients:
1 cup mashed pumpkin
1/2 cup plain low-fat yogurt
1/2 cup honey
1/4 cup softened butter
2 large eggs

Optional:
Sprinkling sugar crystals

Place the pumpkin, yogurt, honey, butter and eggs in a large bowl and stir together with a fork.  Add mix ingredients to the wet ingredients, stirring just until moistened.  Spoon batter into a greased loaf pan, sprinkle with sugar if desired and bake at 350 degrees for 50 to 60 minutes (check for doneness with a toothpick).  Cool in pan for 10 minutes and then turn out onto a rack and allow to cool.


Enjoy!


Monday, November 5, 2012

Meals In Jars ... Chicken Noodle Soup


Chicken Noodle Soup

1) I sauteed the chicken and vegetables with some herbs in a bit of olive oil and then froze it in a Food Saver bag. Of course, you could can it as well, as long as you keep the noodles separate.

 2) A quart of homemade chicken stock

 3) A pint of uncooked egg noodles.

Dump the stock in a pot and bring to a boil. Add the noodles and simmer for about 8 minutes. Add the chicken and veggies and continue to cook until everything is heated through.

Enjoy!


Thursday, June 14, 2012

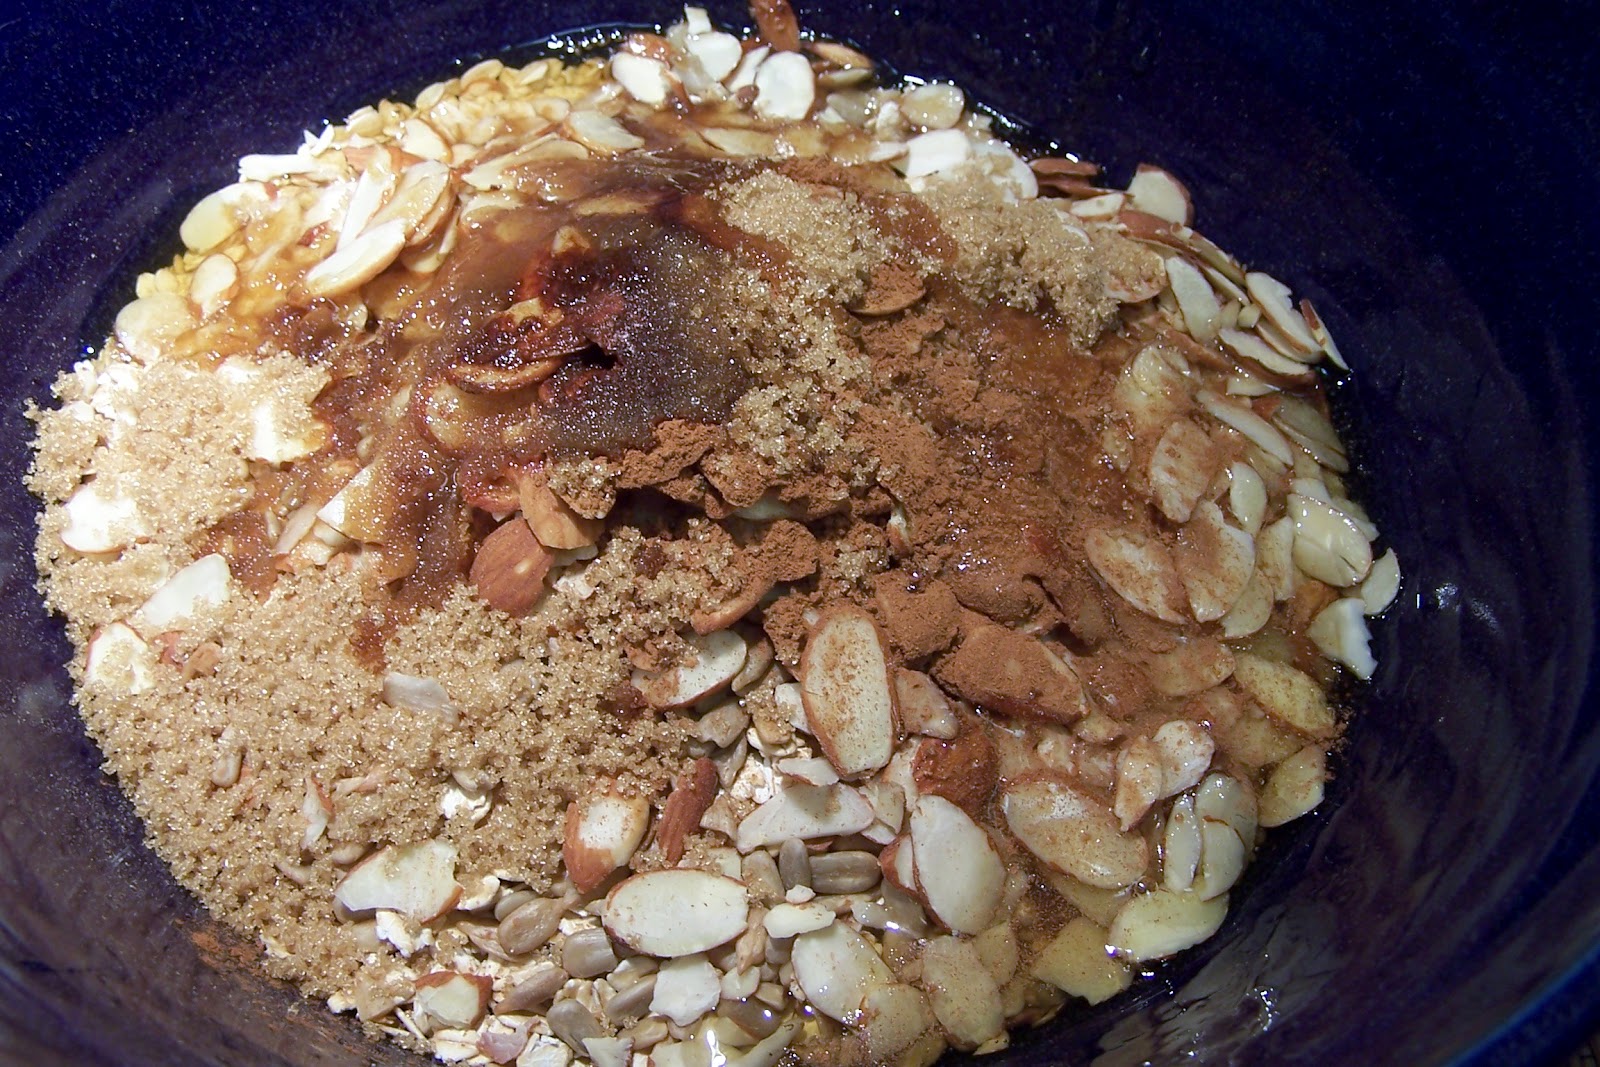
Homemade Granola


I have never been able to find a brand of purchased granola that I like.  Either they have too much sugar, too much salt (Why would you put salt in granola anyway?), bad for you oils or GM ingredients (plus assorted other nasty stuff) ...

YUCK!

So ... after perusing multiple recipes I came up with my own ...


Ingredients:
1) 4 Cups Oatmeal (Bob's Red Mill Extra Thick)
2) 1/4 cup Brown Sugar (organic)
3) 1/4 cup Honey (local from the Farmer's Market in Shelton)
4) 3/4 cup Sliced Almonds
5) 1/2 cup Sunflower Kernels
6) 2 tsp Ground Cinnamon
7) 2 tsp Pure vanilla Extract (unfortunately not my homemade ... it's not ready yet)
8) 1/4 cup Coconut Oil (Mountain Rose Organic)
9) 1/2 cup Golden Raisins
10) 1/2 cup Dried Date Pieces (Bob's Red Mill)
11) 1/2 cup Dried cranberries
12) 1/2 cup Dried Apple Bits (Bob's Red Mill)


Preheat the oven to 375 degrees.  Place ingredients 1 - 7 in a large bowl.


Scoop out the coconut oil (which is semi-solid at room temperature), place in a small glass bowl an microwave for one minute on the defrost setting (Careful!  It melts quickly!)


A little bit is still unmelted ... it won't hurt anything ...


Add the coconut oil to the ingredients in the bowl and mix well.  (NOTE!  Do not add the dried fruit yet ... it gets mixed in AFTER the cereal is cooked.  If you add it now it will all become hard as rocks ... ask me how I know this )


Spread the cereal mix on a large baking tray lined with foil.  Bake for 10 minutes.


Stir and turn the cereal and bake for 5 more minutes ... check the cereal again and if it is a nice  golden brown it is done.  You might want to stir it again and bake for 5 more minutes.


Oops!  I let mine bake an extra 5 minutes (a total of 25 minutes ... 20 would have been enough) ... it got just a little too crispy around the edges.  The rest is fine though.


Allow the granola to cool and then mix in the dried fruit.


This is my favorite way of serving it ... over a bowl of my homemade vanilla bean yogurt and drizzled with a little organic agave nectar ... *bliss*

Enjoy!


Tuesday, June 12, 2012

A Tuesday Tutorial ... Jar Labels

This is just a quick little something I'd like to share.  I like making pretty labels for my home canned foods.


 I print out a design on a color printer (you could also use printed scrapbooking paper) and use a 2" Fiskars hole punch ...


 punch out a bunch of circles ...


... and use a dab of glue stick to attach them to the lids.


What's nice about the glue stick is that the labels will peel off later on without too much effort and without tearing.  You can see the glue residue on this one that was removed from a metal lid ...


and reattached with some more glue stick onto a plastic lid for refrigerator storage.

Here is the graphic that I used.  It's a William Morris wallpaper pattern.  Feel free to copy and print it out for your own labels :)


Enjoy!


Monday, June 11, 2012

Harvest Monday ... and "The Farm" in June


This is today's harvest ...


A crisp head lettuce, a cabbage, some radishes and the first of the garlic scapes.

The lettuce and radishes will be in a salad tonight and I'll make a stir fry with the cabbage later in the week. 


The garlic scapes went straight into some white wine vinegar with some basil.  They will sit in a dark place for about a month and then I'll have a lovely flavored vinegar for salad dressing and flavored cheeses.  Don't you just love my pretty new Weck Jars?

I'm joining other bloggers over at Daphne's Dandelions as we share our weekly harvests...it's fun to see what others are harvesting and what they are cooking up with it...check it out!

"The Farm" is looking great!


Here's a shot taken across four of the raised beds.


I have harvested the Asian Greens that were in the back of this bed, so all that is left is some celery, lettuces and radishes.  I need to replant with the next crop of carrots this week.


The first crops of carrots and beets are sizing up!


Broccoli, peas and cabbages looking good.


I'm still covering the tomato bed at night ... the indeterminates have outgrown the hoops so I had to add an extra riser.  Temperature are supposed to be warming up so I hope to stop having to cover them before they outgrow the riser!  Of course, no sign of tomatoes yet ... :(  Do you see the open vent and fan in the greenhouse in the background?  The vent automatically opens and the fan comes on if the temperature in the greenhouse goes above 80 degrees.  Have I mentioned lately that I love my greenhouse?  Thanks, FitzGyver :)


Tomatoes, eggplants, peppers and tomatillos in the greenhouse ...


There are three Micro Tom tomato plants in this basket.  Look how many blossoms there are on these tiny tomato plants!  I have high hopes for this variety to be a winter producer in the greenhouse under lights!


Wine barrel potatoes looking good!


More potatoes and horseradish sizing up.


The garlic is almost ready for harvest ... I think 2 or 3 more weeks.


And the latest addition to "The Farm" ... a temporary pole and runner bean trellis.  No sign of germination yet but I expect to see them any day if the weather continues warm.

Overall I'm pretty happy with the progress with "The Farm" so far.
Next week I'll give you an update on "The Garden" ...

Enjoy!