Homesteading In The Pacific Northwest
Showing posts with label Watering. Show all posts

Friday, May 20, 2011

Walkabout ...

I did a walkabout in the garden this morning ... enjoying the *gasp* sunshine!!  Yes ...we have sunshine!  Four days in a row now!


My experimental  Dakota shelling peas are enjoying the warm weather ... 
they are about 2 1/2 feet tall now ...and ...


...that arrow is pointing at a pea pod!!  

The experimental snow peas are feeling pretty good, too!


They are almost 4 feet high and covered with blossoms ...  both types of peas are ones I experimented with by starting them early in soil blocks under lights.  I think that effort paid off; the peas that I sowed directly are way behind these ...


The potatoes are growing well ...


Especially the experimental ones that I started early with a germination mat under the box ...


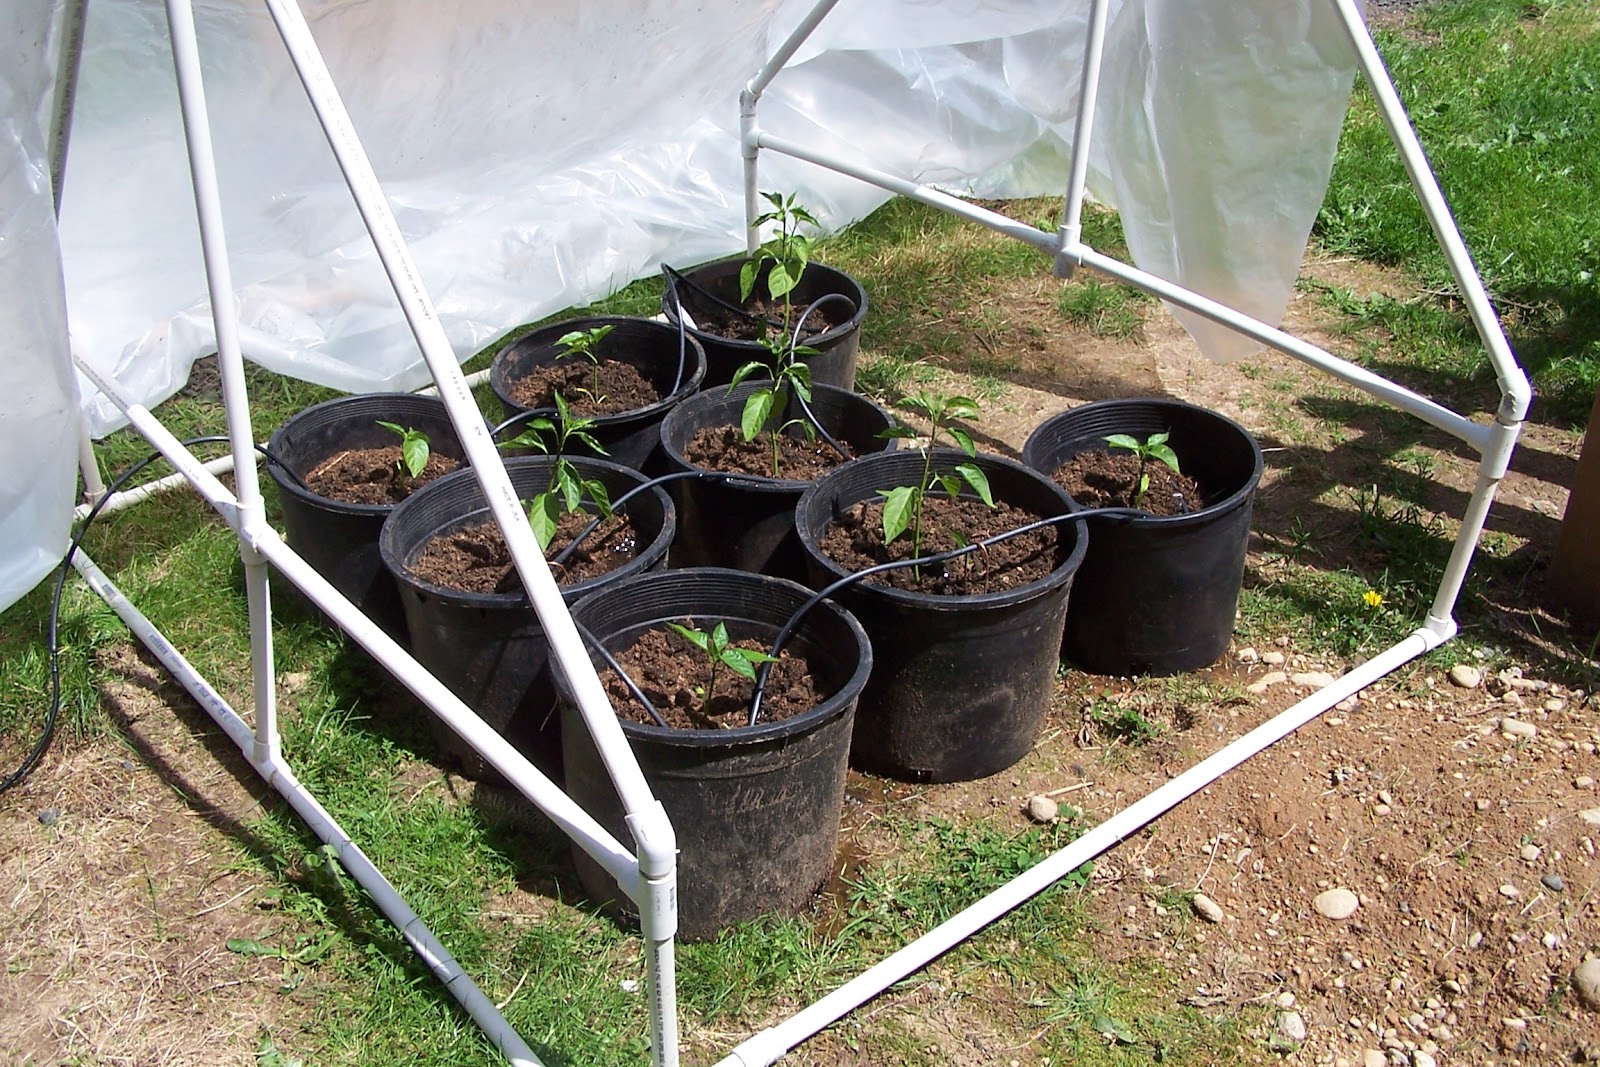
Here's a peek into the greenhouse ... also known as the
"Paradise Cove Tomato Resort"...


I have drip irrigation in the individual pots and the electric box is for the heater and lights (which I hopefully won't need anymore this season).


The kales, chards and tomatoes in the terrace garden are sunbathing today ...


...so are the lettuces : )


And last, but not least, the strawberries in a "vintage planter box" on the deck are starting to blossom!

I'm going to go back outside now and enjoy the sunshine before planting some cucumber seeds to replace the plants that, as my friend Dorothy put it, "committed suicide due to weather induced depression".

Enjoy!


But wait!  Late breaking news!  The all new "Pepper Palace"  : )


Enjoy!

Friday, May 13, 2011

A Garden Update ...

I've spent the last week "puttering" in the garden ... nothing really big is going on right now; I'm just weeding, feeding and playing with some new ideas.


I decided to try direct seeding of some Asian Greens (Joi Choi, Tatsoi, Chinese Cabage and Mizuna) using Annie's Granny's seed mat/tape method.  And I had an idea about making sure that the paper I used for the tapes would dissolve quickly ...


I also had an idea about using seed tapes for planting carrots ...


I set down the tape with the carrot seeds, covered it with a thin layer of soil, watered gently and then cut a piece of clear plastic sheeting and laid it over the soil to keep the moisture in.  I can see through the plastic to check for germination or see if the soil is drying out.  I also laid a soil heating cable on top of the plastic, just to speed things along.

I've been working on the drip system for the raised beds ...


All of the beds on the right side of the garden are now hooked up ... I still need to add another line for the beds in the front and into the greenhouse.  Aren't my peas pretty?  Look at all those blossoms!


I've also added  drip emitters (the little red thing in the photo below) to 
 the potato boxes ...


These are the potatoes from my potato box experiment.  They are about three times the size of the ones I started without a heating mat ... I need to add a fourth board to the box any day now!

I borrowed another idea from Granny; her "Bottomless Tomato Bucket" method for some of my tomatoes ...


These are determinate tomatoes, so they don't need a lot of caging ... the buckets will keep the tomato foliage up off of the other vegetables planted there.  I'm going to add individual drip emitters to the tomato buckets the same as I did for the potato boxes ...

The sun is shining today ... my garden chores are done ...I'm goin' fishing : )

Enjoy!

Monday, April 25, 2011

Drip...Drip...Drip...

I could be talking about our weather here in Washington (I think we've had one day this month that it didn't rain), but I'm actually talking about installing an automatic drip watering system in my raised beds.  I had the first two beds done using the standard system of laying the tubing on the soil and holding it in place with metal staples.  This was the third drip system I had installed in the last 20 years and I have never liked messing with those staples, especially in a vegetable garden ... they are always in the way when it comes time for harvesting and replanting.  I was thinking that there had to be a better way when light dawned ... literally and figuratively ... the rain stopped long enough for me to go set up a bed with my new system.

I used Rain Bird products purchased online and from the local Ace Hardware.  I attached the system to a hose (temporarily; it will go on a faucet with a timer eventually) with this gizmo...


... and then attached some 1/2" tubing ...


I attached some 1/4" tubing to the main line of 1/2" tubing ...


... by punching a hole with this thing ...


...and using a drip system connector ...


Then I used the same gizmo above to connect some dripline tubing (I was able to find some with 6" drip spacing at my local Ace Hardware) ...


... and I closed the system with a couple of small cable ties (the gray line you see in this photo is the soil warming cable...I'll do a post about installing one of those soon ) ...


... and here's the simple little light bulb that went on to make putting the tubing into the bed so much easier ...


I laced the tubing through these neat little eyelet screw thingies that I attached to the sides of the bed!

TAH DAH!


I still have more beds to set up and the first two beds to redo and then I'll attach the 1/2" tubing to the outsides of the beds so it's nice and neat and bury it where it becomes a trip hazard.  And I'm going to add a line into the greenhouse with tubing and emitters for the plants growing in pots there.  I'll post again when I can show you the finished drip system.

I'm glad my beds are all ready for automatic watering come summer ... Uh, we are going to have a summer this year, aren't we??  Please??

Enjoy!